July 2021 Featured Before & After

Here, the clutter in front of and around the fireplace was taking attention away from it.  We removed quite a few things, did a simple furniture arrangement with 4 matching chairs and 2 end tables that the homeowner had, and adjusted the items on the bookshelves. Now buyers are drawn immediately to the fireplace.

June 2015 Featured Before & After

Rooms with open shelves can look especially bare when they are not staged.  Here, we made the whole room look warm and inviting by using furniture and artwork with the same green accent as the walls and adding interest to those bookshelves.
   BEFORE
AFTER

May Featured Before & After

Sometimes homes just need a few things to make them feel a bit more polished.  In this home, we added barstools to draw attention to the breakfast bar, replaced the dining chairs to make the dining area a little more elegant, and added art and accessories to the mantle and surrounding bookshelves to draw buyers attention to the beautiful focal point of the room!
 
BEFORE
AFTER
BEFORE
AFTER

April Staging Tip of the Month

 One of the biggest mistakes that homeowners make in laying out

furniture in their home is pushing all of the furniture up against the walls.  Below is a perfect example of how doing this creates an uninviting space and often makes buyer wonder how they can layout the space to make it feel nicer.
Below, the furniture has been brought into the room, creating a comfortable conversational area without making the room feel smaller.

February 2012 Staging Tip

bookshelf a

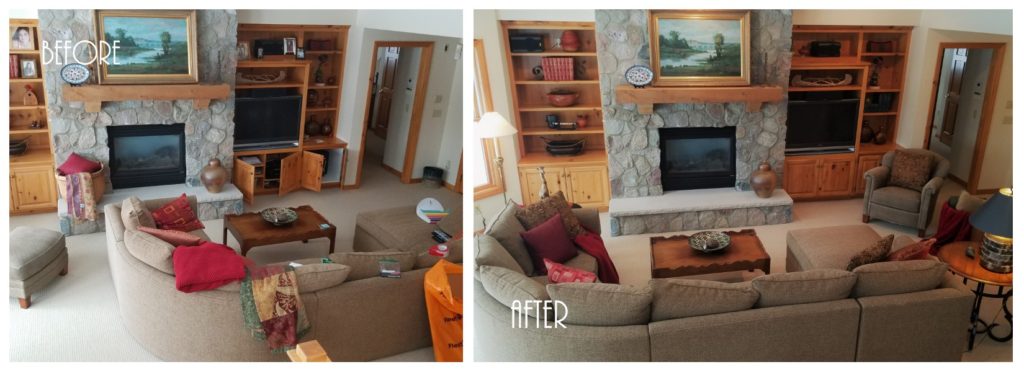
BEFORE:  For most people, it is so easy to let our shelves become a collection place for paperwork, extra books and everyday items.  Even though there are beautiful items in there, they get lost with all of the visual clutter.
STEP ONE:  If you’re selling your home, make sure to remove all photo albums, paperwork, most paperback books, games, and all but 1 or 2 of your favorite personal photos. Don’t forget to wipe down the shelves while they are pretty clear.
A note about photos:  I prefer to stage with black and white photos and only inside shelves. Personal photos should never be hanging on the wall or sitting at eye level, such as a mantle or buffet.  If you’re not selling, you should have your photos out.  But don’t group them all together in one spot….spread them out around your house so that each photo gets to be admired by itself. 
STEP TWO:  First use the hardcover books on opposite ends of each shelf.  Don’t be afraid to lay them horizontally as well.  Odd numbers of book groupings look best.  Then add in your accessories.  If you don’t have enough accessories, don’t be afraid to add in a small piece of art, a book with a pretty cover standing upright, pinecones, rocks or cool sticks from the yard.  And I always like to have a plant for a little life.  The fake plant on the bottom shelf comes from Wal-mart for just $7.  If you need to have some paperwork or smaller items in your shelf, put them inside a beautiful basket first.